While many trail races are marked to some degree, it is all too easy to get lost which can throw your race plans completely out of the window. When racing for a position, I don't really want to have to be checking a map every 5 minutes. Ideally, recceing the route is the best way to be sure of avoiding any geographical incongruities, but this isn't always possible.
An alternative that I have found to work is to plot the route out on Google Earth, and add it onto my Garmin watch so that I have it available for a quick look while running. This post is just a quick "How To" in case you want to try something similar. Here I focus on Garmins, so if you use anything else you will need to work out how to get the file onto your device on your own I'm afraid!
Step 1: Create the route on Google Earth
Google Earth is a pretty great tool and allows you to view the terrain overhead from Google's secret military satellites. It's fantastic for making out paths and things, especially when used in conjunction with OS Maps and things like that. Once you've used it a few times, you get used to working out where the field boundaries are and which routes are tracks that you can run across. Working out which is the path you are looking for is half the fun!
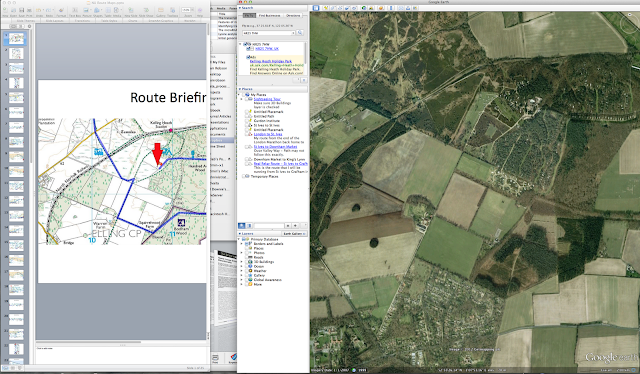 |
| This is Google Earth. They are watching you... |
On the left you can just make out the map that I am using. This is one of the maps for the Norfolk Ultra and has the route marked on with a blue line. On the right, I have aligned the Google Earth viewer to roughly the same location. I won't go too much into how to use Google Earth (see
here for a tutorial). I will be using two of the tools from the top bar: the
Add Placemark tool (looks like a push pin) and the
Add Path tool (looks like three points connected by lines).
First of all, create a new folder in the
My Places section on the left of the screen. This is where all of the paths and things that I put together will go.
Next I create placemarks to mark the start, end, and checkpoint locations. It's pretty simple. Just click on the button and a marker will appear. Move it to where you want, and play around with the format (if you can be bothered).
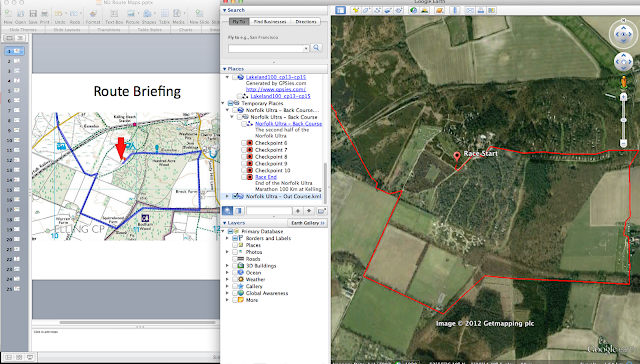 |
| Here you can see a placemarker for the start, and the path that I have created matching the route on the map to the left |
The path will show the actual route and is the main thing. Select
Add Path and begin to make your path. Click on the start point, and then every time you click a straight line will be produced from the previous point. Keep doing this following the route that you want. I tend to be quite careful to follow the route as closely as possible, but you can be as slapdash as you want to be.
Obviously, it is not always possible to judge where the path goes and you might get it wrong, but typically I have found that this procedure works really well and gives great results when you actually get out there.
 |
| The complete route |
Now you have a completed path, you can format it however you like (change the colour, change the line width, add a description, etc.). Once this is all done, you can save the entire thing in the KML (Keyhole Markup Language - it's a bit like XML) format. Make sure that everything is in the folder that you created for this race, then right click on the folder and select
Save Place As... Save as a .kml file.
Step 2: Convert into Garmin format
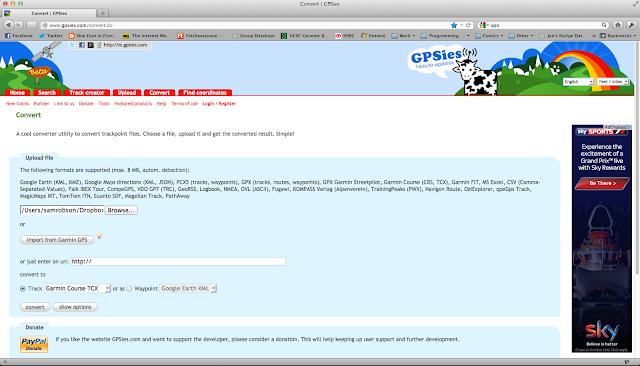 |
| gpsies.com/convert.do for converting from .kml to .tcx file |
Next we want to convert the Google Earth file into a format that can be read onto a Garmin. To do this, I use the website
gpsies.com/convert.do, a fantastic free site (although they do take donations) for converting various types of GPS file. Simply load in your newly created .kml file and select "Garmin Course TCX" at the bottom. Click convert, then save the resulting file.
Step 3: Add to your Garmin
 |
| Importing data to the Garmin Training Center |
To load it onto my Garmin, I will be using the Garmin Training Center. First we import the data by clicking on
File >
Import and select the newly created .tcx file. This will load it as a course which looks like this:
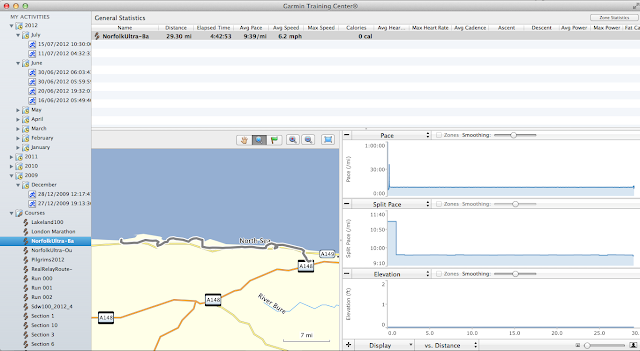 |
| What the course looks like in the Garmin Training Center |
Finally we send the course over to the watch. I use a Garmin Forerunner 305, but I assume the method is pretty much the same for other watches.
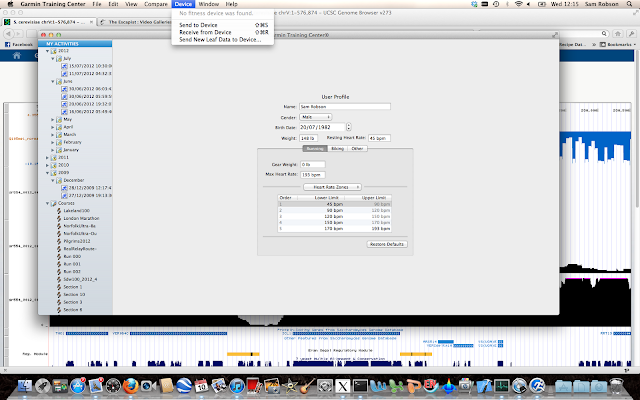 |
| Sending the data to the watch |
Step 4: Go out and run!
Et voila! The course is now available on your watch. Just go to
Training >
Courses then select the course that you want to run. Select
Do Course and you're off. It will tell you how far you have to go to the end of the route, and you will see an arrow (you) on a line (the route). All you need to do is make sure that the arrow points in the right direction and that you roughly follow the line. Bear in mind that you may have gotten the exact position of the paths wrong, but overall the line will show you the direction that you should be heading. If you start heading off course it will soon become clear. You may need to zoom into the map for optimum performance, but the more you zoom in the less in advance you will see the turns. Play around with it to see what works for you. I normally use about a 200ft radius, which I find gives enough resolution to see the twists in the course, but also provides enough forewarning of upcoming turns.
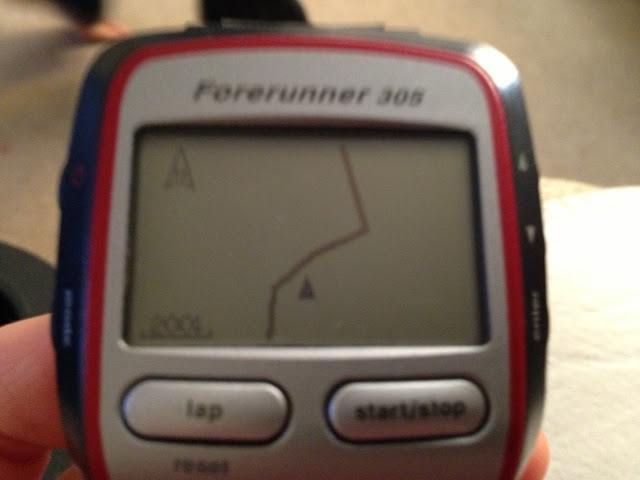 |
| Just follow the line! |
Hopefully this will be of use to some people. Please comment if you run into any issues, or if you have any other suggestions for creating simple course maps. I have routes created for most of the races I have run this year, so if you want copies of these just give me a shout.
Edit: Another option is to use the website
bikehike.co.uk which allows you to create GPS tracks from OS maps of the UK directly. I haven't used it yet, but it looks very useful! Thanks to Bryan who put me on to this website.


Good write up Sam. Another option is to use bike hike.co.uk where you can plot a route and send it straight to your device.
ReplyDeleteThat's a fantastic website, thanks very much. Very useful if you don't have a map to work off of.
ReplyDeleteIt is easier to use gpsies.com direct to create a route. The creation of the route is there pretty easy.
ReplyDeleteI didn't actually realise that you could create your own tracks using the gpsies.com site. Thanks very much for that!
ReplyDeleteI use bikeroutetoaster.com as it actually creates the route following footpaths using OSM (if that's what you want), and doesn't just join points in straight lines. You can mix and match the two for when you're not on a footpath.
ReplyDeleteYou can also export directly to Garmin (if you have the Connect plugin installed) or save to GPX and TCX. If you create an account, you can also save courses for later use and/or publish them.
Great post with useful insights, thanks for sharing! If you need a free converter tool to turn kml file into gpx format or vice versa for your routes or tracks, I suggest to have a look at this one: http://gpx2kml.com/ ; it's free and easy to use. Thought it might be useful!
ReplyDelete